Search This Blog

Thursday, December 27, 2018

Sammy Stocking 2

Hanging by our fireplace


     This week I am showing you the second stocking I did for the newest grandchild.  This one is to hang at his house.

Cutting apart the jeans

     I started with a pair of my husband's old jeans.  Grandpa's jeans make the best stockings for the grandsons.

Cut leg

     I cut off the legs, one below the pockets and the other at the large rip in the front.

Pattern placed for the front of the stocking

     I placed the pattern for the front of the stocking on the longer leg piece.  I did have to turn it upside down to get the best layout.

Traced pattern

     I then traced around the pattern piece with my Chac-o-liner.  This left the piece big enough to hoop for the embroidery.

Templates in place

     I then laid out the printed templates and marked the crosshairs for design placement.  I hooped the jean leg three times and stitched out each design.

Cutting the back of the stocking

     While I was stitching out the embroidery designs from Embroidery Library, I cut out the back part of the stocking and the lining pieces.


     I also cut a piece of felt for the cuff and embroidered his name on it.  I sewed the lining pieces, right sides together, the outer pieces, right sides together and the short ends of the cuff piece, right sides together.


     I then tucked the lining into the stocking with wrong sides facing.  I added a loop made from the hem of the jeans to the top and then tucked the cuff into the stoking with the right side facing the lining.  I stitched all around the top and then flipped the cuff to the outside.


     All ready now to hang by the fireplace.

Tuesday, December 18, 2018

Sammy Stocking 1


Stocking to hang at grandma and grandpa's house

     A new grandchild means a couple of new Christmas stockings.  I make/decorate one for our house and then make one for their house.

'Ready to decorate' stocking from Target

     Today I will show you the one for our house.  I bought this blank stocking at Target, said it was ready to decorate.

Cuff all embroidered

     First I removed the cuff and opened it up.  I stitched on his name, using a printed template of the design to make sure I had it above the line.

Doing the embroidery

     Then I had to further deconstruct the stocking to add an embroidery design from Embroidery Library.  I chose a cute gingerbread man because I had bought him some Oh Snap pajamas from Old Navy.

Putting it back together

     After finishing the embroidery, I serged the sides back together and then turned it right side out and redid the top-stitching around the edge.  I reattached the cuff after putting it back together.

Detail of embroidery

     Next week I will show you the one I made for hanging at his house.

Wednesday, December 12, 2018

Aqua and Coral Stepping Stones Quilt

Finished quilt


     I found the large scale fabric at Mill House Quilts in March 2017.  The colors really intrigued me so I bought a couple of coordinating fabrics to make a quilt.

Block detail

     The pattern I used was Fabric Cafe - Stepping Stones that I bought as a downloadable pattern. It calls for there 1 yard pieces of fabric which includes the binding.  The only problem is, is that it is only a single fold binding and I like mine to be double fold.  I bought an extra half yard of the dark grey fabric so I could make the binding my way.

Label 1

     This makes just a small, 44" x 58", quilt.  The cutting was easy enough as was the piecing.  I bought flannel at JoAnn Fabrics for the backing.

Label 2

     I had Sally of Windy City quilting, do the quilting.  I than made a couple of labels with my embroidery machine and then did the binding.

Quilting detail

     Just a fun, quick quilt that showcases larger scale prints nicely.

Wednesday, December 5, 2018

Teal Swing Dress

Pattern

     I had a beautiful piece of teal knit fabric in my stash and wanted a new dress for fall/winter.  I liked the swing dresses I had bought at Old Navy, so I decided to sew one for myself.

Taping the pieces together

     The bottom part of the dress is so big around, I had to tape the pattern pieces together.

Laying it out in my foyer

     The only place in the house that was big enough to lay out the fabric to cut, was my foyer floor and even then I couldn't get it all flat at the same time.

Stabilizing the neckline

     I used pins to mark the right side of the fabric because it was difficult to tell them apart.

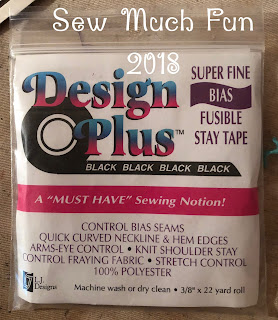
Stay tape I used

     The sewing went much easier than the cutting.  I stabilized the neck edges as the pattern directed using Design Plus stay tape.  I also stabilized the shoulder seams so that they wouldn't stretch.

Sewn shoulder seam with the stay tape in place


     The pattern called for a hook and eye opening in the back but after I made it I realized I probably could have skipped that part.  The dress went over my head without undoing it.

Finished dress

     I think this pattern has more width in the skirt than the dresses I have from Old Navy.  Also the fabric is a little heavier so it doesn't lay against the body as much.  I like the feel of the dress, I just wish it had a little less volume.  If I make this again I might play with that a bit.

Detail of neck and shoulder

     The fabric was a dream to work with and I love the color.  I already have worn it a couple of different ways.