Search This Blog

Wednesday, August 30, 2017

Purse Remake

Original purse


     I had a client that had a cloth purse she loved but it was getting a bit worn.  Also it was just a touch too small to fit her new phone.  She brought it to me so I could make a new one, slightly larger.

Zipper application


     As I deconstructed the purse, I took a lot of photos with my phone.  I also took notes as I was taking it apart and also remaking it.  Above is a photo showing how the zipper was attached to the lining as I was remaking it.

New purse inside


     The client chose some fabric from my scraps and she wanted to reuse the zippers and strap with its hardware.  This definitely saved some money and time trying to find the right items.

Finished purse


     The project took longer than I thought with all of the careful deconstructing, pattern making and note taking that had to be done.  The pocket on the front of the purse was a challenge as I had never done one like that before and I didn't find any instructions for something similar in all my purse patterns.

     This project certainly stretched my brain.  I also found out I would much rather start with a pattern and do some alterations than try to copy a ready made object.

Wednesday, August 23, 2017

Jungle Four Plus One Quilt

Finished quilt


      This is the last quilt I made for our family vacation.  This one is for our youngest grandson.  I bought a couple of collections of five one yard pieces of coordinating flannels.  When I bought them, they came with some directions for different quilts.  I chose the Four plus One pattern.

Block and border in more detail


     I was debating between the chevron or argyle pattern for the four patch block.  I'm not sure that I like how the border turned out with the colors switching so abruptly where the pieces were joined, maybe to argyle would have been a better choice.

Appliqué block, cute tiger


     Then it was choice between the orange or the green for the other large block.  I knew that the jungle print was one large block as it was my focal fabric.  I decided to use the green as it seemed to 'match' the jungle print and thus provided a flow with those blocks.

Label 1


     After putting it together, those green blocks looked lonely.  I used a couple of design sets from Designs by JuJu.  The appliqués were fun to work with.  I used scraps from my stash and also a couple from his cousin's quilt.

Label 2


      I then had it quilted with a fun jungle animals design.  Can you spot the lion, elephant and giraffe in the picture below?  I added two labels with all the info and did a binding from leftover fabric from the quilt.  

Quilting detail. Fnd the lion, giraffe and elephant


     His mom says he loves his quilt and seems to find something new each time he plays on it.


Wednesday, August 16, 2017

Cuddle Cakes Quilt

Finished quilt


     This summer we vacationed as a family in Fairfield Glade TN.  The group included our three children, two in-laws, one fiancee and three grandchildren plus my husband and I.  I had bought some quilt kits a year or two ago and decided that this vacation would be a fun time to give them to the grandchildren.

Applique block

     For our granddaughter, I bought a kit (from Mill House Quilts) that used Minky fabric and flannel.  The kit included the book with directions for the flower appliqué block.  The background was a white flannel with pink flannel flowers and green print cotton leaves.  The stem was a jumbo rick-rack and the center was cut from the Minky fabric.

Label with date

     The applique blocks went together fairly easily using the blanket stitch on my sewing machine and fusible web.  The rest of the quilt was a challenge though.  The Minky fabric was difficult to cut with the rotary cutter and it left a mess everywhere.  The fabric stretched when sewing it together and the blocks were not all even.

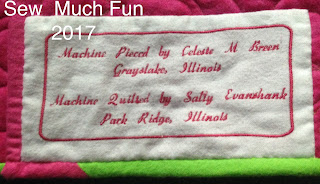
Label with piecer and quilter listed


     The kit was not very large so I added some fabric from my stash, lime green and hot pink flannels.  I then bought some flannel for the backing and was able to use the leftover flannels to make a multi color binding.  I'm kind of liking doing that, I wound up doing it on all three quilts for the grandkids.

Detail of quilting
 
     I had it quilted with a flower pattern and then made a couple of labels for the back.  She loved how soft it was.  The evening I gave the grandkids their quilts, we had a 'sleepover' in grandma and grandpa's room.  They used their new quilts like sleeping bags.


Wednesday, August 9, 2017

Another T-shirt Quilt July 2017


     Last month before heading out on vacation, I did this t-shirt quilt for a client.  These are her daughter's t-shirts and sweatshirts from college and her sorority.

     The first step is to cut the front and back apart.  A couple of her t-shirts, she wanted both the back and front used and some just the back.  After cutting apart the shirts, I cut the iron-on interfacing into 15" x 15" pieces.  I ironed these to the backs of the shirts and then cut my squares using my 12.5" x 12.5" ruler.  I then laid out the squares to get a pleasing layout and sewed them together.


     They chose this fun pineapple print fleece for the backing.  I pieced it to get a big enough piece for the back.  I laid it right side up on the floor and then placed the sewn together t-shirts on top with right side down.

     I placed the pins parallel to the edge and trimmed the backing to match the front.  I sewed all around with a 1/4" seam allowance and left an opening to turn.  After turning it right side out, I topstitched close to the edge, closing up the opening.

     To keep the layers together, I stitched in the ditch at the corners of the t-shirts.  You can see a little what it looks like on the back (see arrow).  From the front you usually don't see the stitches.  Next t-shirt quilt will be one for me, I hope.


Thursday, August 3, 2017

Pile of Pillows 2017

Pile of Pillows

     That past four mornings were spent with three girls sewing pillows for their rooms.  The pillows they made were a flange pillow, then pieced squares, followed by a blog cabin and finally a patchwork one with silk flowers.

Kelsey and her blog cabin pillow

Kelsey's pillows

     Kelsey has been taking summer lessons with me for a few years.  She not only finished the four pillows that I had planned but also a rectangle one just using two fabrics, the feather fabric and the coral and white geometric print.

Kara and her patchwork pillow

Kara's pillows

     Kara has also been taking summer sewing for a few years.  She opted for one large flower on her patchwork pillow.

Natalie loving her pieced squares pillow

Natalie's pillows

     Natalie just started sewing with me this spring.  She won a pillowcase class at a school auction, then took beginning sewing a couple of weeks ago and now this pillow camp.  She didn't have time to make buttonholes on her last pillow but did get to sew some buttons on anyway.

Blog cabin pillows

    The girls learned the importance of keeping an even seam allowance so that their blog cabin pillows turned out the right size.  They used the eyelet stitch on the machine to sew their flower petals in place after using Wonder Tape to hold them down.

Pieced squares pillows

   
     Kelsy and Kara made buttonholes and everyone sewed on buttons using the machine.  I did all the cutting for the girls to speed up the process but also to make sure that they were the correct size so that it all went together okay.  The girls said that had fun shopping for fabrics and their choices sure did make for a variety of looks.

Flange pillows
     Now a couple of weeks off and then after school classes will start the week after Labor Day.