Search This Blog

Thursday, December 27, 2018

Sammy Stocking 2

Hanging by our fireplace


     This week I am showing you the second stocking I did for the newest grandchild.  This one is to hang at his house.

Cutting apart the jeans

     I started with a pair of my husband's old jeans.  Grandpa's jeans make the best stockings for the grandsons.

Cut leg

     I cut off the legs, one below the pockets and the other at the large rip in the front.

Pattern placed for the front of the stocking

     I placed the pattern for the front of the stocking on the longer leg piece.  I did have to turn it upside down to get the best layout.

Traced pattern

     I then traced around the pattern piece with my Chac-o-liner.  This left the piece big enough to hoop for the embroidery.

Templates in place

     I then laid out the printed templates and marked the crosshairs for design placement.  I hooped the jean leg three times and stitched out each design.

Cutting the back of the stocking

     While I was stitching out the embroidery designs from Embroidery Library, I cut out the back part of the stocking and the lining pieces.


     I also cut a piece of felt for the cuff and embroidered his name on it.  I sewed the lining pieces, right sides together, the outer pieces, right sides together and the short ends of the cuff piece, right sides together.


     I then tucked the lining into the stocking with wrong sides facing.  I added a loop made from the hem of the jeans to the top and then tucked the cuff into the stoking with the right side facing the lining.  I stitched all around the top and then flipped the cuff to the outside.


     All ready now to hang by the fireplace.

Tuesday, December 18, 2018

Sammy Stocking 1


Stocking to hang at grandma and grandpa's house

     A new grandchild means a couple of new Christmas stockings.  I make/decorate one for our house and then make one for their house.

'Ready to decorate' stocking from Target

     Today I will show you the one for our house.  I bought this blank stocking at Target, said it was ready to decorate.

Cuff all embroidered

     First I removed the cuff and opened it up.  I stitched on his name, using a printed template of the design to make sure I had it above the line.

Doing the embroidery

     Then I had to further deconstruct the stocking to add an embroidery design from Embroidery Library.  I chose a cute gingerbread man because I had bought him some Oh Snap pajamas from Old Navy.

Putting it back together

     After finishing the embroidery, I serged the sides back together and then turned it right side out and redid the top-stitching around the edge.  I reattached the cuff after putting it back together.

Detail of embroidery

     Next week I will show you the one I made for hanging at his house.

Wednesday, December 12, 2018

Aqua and Coral Stepping Stones Quilt

Finished quilt


     I found the large scale fabric at Mill House Quilts in March 2017.  The colors really intrigued me so I bought a couple of coordinating fabrics to make a quilt.

Block detail

     The pattern I used was Fabric Cafe - Stepping Stones that I bought as a downloadable pattern. It calls for there 1 yard pieces of fabric which includes the binding.  The only problem is, is that it is only a single fold binding and I like mine to be double fold.  I bought an extra half yard of the dark grey fabric so I could make the binding my way.

Label 1

     This makes just a small, 44" x 58", quilt.  The cutting was easy enough as was the piecing.  I bought flannel at JoAnn Fabrics for the backing.

Label 2

     I had Sally of Windy City quilting, do the quilting.  I than made a couple of labels with my embroidery machine and then did the binding.

Quilting detail

     Just a fun, quick quilt that showcases larger scale prints nicely.

Wednesday, December 5, 2018

Teal Swing Dress

Pattern

     I had a beautiful piece of teal knit fabric in my stash and wanted a new dress for fall/winter.  I liked the swing dresses I had bought at Old Navy, so I decided to sew one for myself.

Taping the pieces together

     The bottom part of the dress is so big around, I had to tape the pattern pieces together.

Laying it out in my foyer

     The only place in the house that was big enough to lay out the fabric to cut, was my foyer floor and even then I couldn't get it all flat at the same time.

Stabilizing the neckline

     I used pins to mark the right side of the fabric because it was difficult to tell them apart.

Stay tape I used

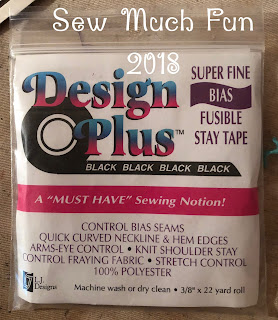
     The sewing went much easier than the cutting.  I stabilized the neck edges as the pattern directed using Design Plus stay tape.  I also stabilized the shoulder seams so that they wouldn't stretch.

Sewn shoulder seam with the stay tape in place


     The pattern called for a hook and eye opening in the back but after I made it I realized I probably could have skipped that part.  The dress went over my head without undoing it.

Finished dress

     I think this pattern has more width in the skirt than the dresses I have from Old Navy.  Also the fabric is a little heavier so it doesn't lay against the body as much.  I like the feel of the dress, I just wish it had a little less volume.  If I make this again I might play with that a bit.

Detail of neck and shoulder

     The fabric was a dream to work with and I love the color.  I already have worn it a couple of different ways.

Wednesday, November 28, 2018

Fall Floral Blouse

Fabric

     For a fall style challenge I did with GYPO a floral blouse was on the list.  I had bought this fabric at JoAnn Fabrics.  It is a light silky fabric with all my colors.  This would be my blouse for the challenge.

Pattern

     The pattern I chose was this McCall's pattern.  It is very similar in style to a couple of Coldwater Creek blouses that I have and love.

Fabric detail

     The fabric was a bit difficult to work with as it was quite slippery.  I got it all cut and then started putting it together.  I had a heck of a time doing the neck opening.  Not sure if it was the fabric or the directions.  I have been sewing for a long time and this had me stumped.  After several attempts I finally got it to look okay.

Poor directions with no steps for setting in the sleeve

     Things went better after that.  I prepared the sleeves as the directions stated and then moved on to the next steps.  As I was going to do the hem, I realized that at no point in the directions did it ever say to set in the sleeves.  Fortunately that is a rather straight forward process so it was just fine.  I wonder thought what a beginner might have done.

Finished blouse

     I did close up the neck opening some with some hand stitching otherwise I felt it would have shown too much.

Sleeve detail

     I found some buttons in my stash that worked great for the roll up button tab.

Neckline detail

     After putting it on, it felt longer than my other blouses and longer than it looked on the pattern envelope.  Also I feel like it is a little too roomy.  

     Not sure I would make this pattern again, between the poor directions and the not so flattering fit, it is not going on my must do it again list.

Tuesday, November 20, 2018

Thanksgiving Meal 2018

Cranberry Jalapeno Dip

     We hosted Thanksgiving dinner on Sunday.  There were 18 of us plus one infant.  I started with a veggie tray, some pretzels and this awesome Cranberry Jalapeño Dip.  My husband declared it one of the best appetizers I have made.

Roasted Butternut Squash and Bacon Soup
   

     The first course was Roasted Butternut Squash and Bacon Soup.  I finally bought myself an immersion blender.  Made making the soup so much easier.  I cheated and bought already cut-up squash.  It helped so much not having to peel and cut that up along with everything else.

Green Beans with Cranberries and Walnuts

     The meat this year was beef roast as I do not like turkey or ham.  The sides included Green Beans with Cranberries and Walnuts, Squash Casserole and Slow Cooker Sweet Potato Mash.  I like using Pinterest to find new recipes.

Squash Casserole

     Our daughter-in-law also made a cranberry relish using Jell-O.  It was really good.  I wasn't too fond of the green beans dish but the squash and sweet potatoes were really good.

Slow Cooker Sweet Potato Mash

     I did not have any topping on my sweet potatoes like the photo shows, the recipe didn't call for anything and several family members don't like or are allergic to nuts.  I made the green beans with one bowl only with nuts, the other had none.


Acorns for dessert


     For dessert we had Hershey Kiss Acorns that my daughter and her two kids made, Pumpkin Cheesecake Trifle that I made and sweet potato brownies that my older son made.  It was all yummy.

Pumpkin Cheesecake Trifle

Tuesday, November 6, 2018

Halloween T-shirts

Hooped through the arms


     My daughter asked if I could embroider a couple of t-shirts for the kids to wear on Halloween.  My grandson's costume, a traffic light, was not very conducive to wearing during the school day.  He wanted a skeleton on his.  I didn't have any I liked in my stash of designs, so off to Embroidery Library.  I found a cute one there.
Dancing skeleton

     To hoop his shirt, I put the arms of the embroidery hoop through the arms of the t-shirt and then made sure the bobbin arm went through the neck opening.  Some iron-on mesh stabilizer on the shirt and a piece of tear-away floated under the shirt provided all the support needed.

Hooped through the neck and bottom

     My granddaughter didn't want a costume, just a shirt with a Jack-o-lantern on it.  She had seen one that had eyelashes and a heart shaped nose.  Again nothing in my stash of designs.  I found this build a Jack-o-lantern at Embroidery Library.   I just used iron-on mesh stabilizer on her shirt because the fabric appliqué helped to support the stitches.

Ladylike Jack-o-lantern


    I built the Jack-o-lantern in my software, choosing the eyes with eyelashes and a pretty lips mouth. Because her design was taller, I hooped her shirt with the arms of the embroidery hoop through the neck and bottom of the shirt.  Then the bobbin arm went through a sleeve.

Two cuties on Halloween


     They both liked their shirts.  My grandson liked to pose like the dancing skeleton and my granddaughter really liked the fancy eyes and lips on her Jack-o-lantern.

Wednesday, October 31, 2018

A Tale of Two Footstools

Footstool #1 before

     A client brought me two footstools they had bought.  They wanted them to be slipcovered to match their decor.  No problem I thought, but when they brought them by, one actually opened up and they wanted to preserve that feature.

Top for footstool #1

     The first one was pretty straight forward.  I measured the top and cut it out.  Then I sewed on covered cord.
Skirt for footstool #1

     For the skirt, I again measured and then cut pieces to sew together to make the skirt.  I needed to be sure to hide the seams in the pleats in the corners.  I added lining and sewed it into a big circle.  I serged the top edge to keep the raw edges together and then pinned it to the top and sewed all around.

Footstool #1 finished

     I then just slipped it over the footstool and I was done.  Now on the the other one.

Footstool #2 before


Footstool #2 before

     I couldn't make a slipcover for this one as they wanted to be able to open it up.  I took it part and started to get to work.

Lining covered foam getting fabric stapled in place

All stapled to the particle board


     I took off the old cover because we didn't really want the cording to be seen under the new fabric.  I covered the foam with some lining and then stapled the fabric over the board that was not seen.  Put the nicer wood grain looking board back over it and it all looked fine.

Oh No!  You can see the edge of the board

  Oh no, you could see the edge of that board.  That did not look good at all.  I consulted with my clients as to our options.  We chose to place the fabric over both boards and then apply gimp to cover the raw edges.

Top recovered with gimp in place

Top recovered with gimp in place detail


     Okay, part one solved.  Now for the bottom part.  The footstool was not square and it also had flared legs.  I decided the best option would be to make the 'skirt' in eight pieces.  I made four corner flaps and stapled them in place.

Starting on the corner flaps

Corner flaps in place, note the line for placement

Corner flaps in place

     To be sure everything lined up properly I drew a line on the inside that would be the mounting line (client was fine with the gold vinyl showing on the inside).  The other skirt pieces were cut in a trapezoid shape so that they could flare out with the legs.

One side flap sewn with lining

Understitching to keep the lining in place

     I lined the pieces and then to be sure the lining didn't peek out to the outside, I did an understitch to keep it in place.

Inside all pretty with gimp covering the raw edges

  I then again covered the raw edges with the gimp and reassembled the footstool.

Footstool #2 finished

  I think they turned out okay and the clients were happy.

Finished footstools